I can't say that I'm experienced in Asian cooking, and wasn't entirely sure how my efforts would turn out, but this meal has quickly moved towards the top of my favorites list. The meal was very easy and fast to make, lighter than expected while still being filling, and absolutely delicious. You could easily make it with tofu, or with no "meat" at all, as well as with the shrimp that I used in this one version. It has plenty of flavor to go around!
To round out the meal I tried my hand at making egg drop soup with a twist - green onions. I have to admit, this was more fun than I originally expected. If you haven't made this before it's very simple to follow and definitely different than any other soup that I have made before. Get excited and give it a try!
Stir-Fried Noodles with Shrimp and Vegetables
Sadly, I do not have a wok. I know... What kind of cook doesn't have a wok? (Feel free to fix this travesty by giving me one.) If you have one, you'll want to use it for this recipe, but if you do not, don't stress! You can use a large fry pan as a substitute. I used my biggest one that is more like the base of a cylinder with vertical sides rather than a smaller one with curved sides. This gave me plenty of space for stir-frying.
First, let's get the noodles out of the way. I used pad-thai style noodles for these which are basically flat rice noodles. These stir fry extremely well, but you can substitute Chinese egg noodles if you prefer. Prepare the noodles according to their instructions. If, like me, you choose the pad-thai style noodles then you'll most likely be soaking them in warm water for about ten minutes. Once they are soaking (or boiling if those are the instructions) you can start with the stir fry. They will be ready by the time you need them!
Put a tablespoon of peanut oil in the pan and heat over medium to medium high heat. Add two cloves of minced garlic and two shallots once the oil is heated. Stir often to keep the garlic and shallots from burning. Let them cook for 3 minutes and then add shrimp. For best results, buy peeled and de-veined shrimp! That way you do not have to do that yourself. You can leave the tails on or pull them off. Personally, I prefer to pull them off before cooking but it is absolutely acceptable to cook the shrimp either way.
Continue to stir the shrimp often; you want to ensure they are getting flipped over as well so they can cook evenly. Right after adding the shrimp, toss in 2 cups sliced cremini mushrooms. Make sure they are down to a bite-sized slice! Stir and cook for 5 minutes. Add 1/2 cup diced green onions. Continue to stir and cook for another 3-4 minutes.
At this point the shrimp and the mushrooms should be just about done! Shrimp turn pink when done and mushrooms should be soft and wilting. Toss in 2 cups of bean sprouts, 2 cups diced tomato, and 4 tablespoons of chopped basil. Add the noodles. (Note: these should already be cooked.) Pour in roughly 1/4 cup of soy sauce. Make sure to use a low-sodium variety. I prefer dark soy sauce, but you can use either version.
The stir fry should look basically done at this point. The noodles should be lightly coated with a dark sauce. You want to make sure the sauce is enough to cover the vegetables and noodles, but not so much that it is pooling. Toss in a little bit of teriyaki sauce as well for some variety. (Also purchase low-sodium teriyaki sauce.) Continue cooking for another 2-3 minutes. Add more sauce if needed - either soy or teriyaki to taste.
Remove from the stove and enjoy!
Green Onion Egg Drop Soup
This is truly fun to make. Really. And I can't take credit for the recipe. And believe it or not, it's incredibly simple to make as well.
Read through the entire recipe first and be ready to go because it moves quickly. You'll basically throw most of the ingredients in, simmer a bit, and then get to the egg. And this is where it's entertaining. You know how you get those bits of egg in egg drop soup? You drop a beaten egg into simmering broth! And it forms immediately! Instantaneously! It's amazing.
What can I say - it's the simple things in life that amuse me!
So jump on in, stare in amazement at your soup, and chow down on some amazing stir-fry.
Friday, July 31, 2009
Monday, July 27, 2009
Roasted Tilapia with Caramelized Leeks with Roasted Potatoes with Herb Vinaigrette and Parmesan Zucchini-Sticks
Apparently the theme of the day is roasting. The tilapia, potatoes, and zucchini are all prepared in the oven, leaving your stove top relatively clean for once! But, don't worry, we'll still be making a little bit of a mess as we dive on into this delicious cornucopia.
The simply prepared, savory tilapia is complimented by sweet, caramelized leeks that bring out the herbs on the potatoes. Then, to round it all out, the zucchini is prepared with a bit of parmesan style, baked in a style that at restaurants is so often fried. The fun finger food is delicious and adds a bit of calcium and pizazz to a more classic entree and potato side. Prepare this meal when your guests are fans of eating with their fingers!
Roasted Tilapia with Caramelized Leeks
Did I mention I love caramelized vegetables? The most typical version is the onion, which is absolutely delicious. However, you can caramelize many other vegetables as well. Green onions and leeks, close relatives of our friend the Vidalia onion, are both great options for caramelization.
Buy one large bunch of leeks per pound of fish, or two if you realllllllllly love leeks. Cut up the leeks into slices so you have strings and circles of the vegetable. Heat a little bit of butter in a pan (about 1 tsp.) Remember, whenever I say butter I mean fake butter! I only use LITE I Can't Believe It's Not Butter which is at least half the calories of the original substitute. When the butter has melted place the leeks in the pan and keep the heat on medium low. Cook the leeks, stirring frequently to avoid having them burn or stick to the pan.
After about 10 minutes sprinkle some brown sugar on top. You'll want to use about a tablespoon of brown sugar here. Stir well so that the sugar is melted and absorbed. After an additional 10 minutes add a little more brown sugar to taste (and look.) Continue stirring and cooking over medium low heat for another 5-10 minutes. You're leeks should now be lightly browned and well wilted. Not only did you add sugar, but this slow caramelization process brings out the natural sugars as well.
Place your tilapia filets on a baking sheet. Place 1/2 a teaspoon of lemon juice on each filet. Sprinkle with black pepper and red pepper. You can also sprinkle very lightly with fake salt (or real if you must.) Bake at 400 degrees for 10 minutes. Serve with the leeks over the top of the filets.
Roasted Potatoes with Herb Vinaigrette
The herb vinaigrette adds a nice twist to the more old-fashioned and common roasted potato. You'll see this recipe has you roast the potatoes and then pour on the vinaigrette right at the end. I, however, preferred to add 5 minutes of additional roasting time after the vinaigrette was added. Cooking the potatoes with the herbs and sauce allows the flavor to be locked in.
Keep in mind that potatoes take a while to roast. Although the fish entree is listed above you will probably want to get the potatoes going first and then not start the rest of the meal until your finished products will line up. While these potatoes are delicious, they are not quite as enjoyable cold!
Have some leftovers? Re-heat them on the stove and serve them with an omelette for some delicious breakfast potatoes.
Parmesan Zucchini Sticks
Finally, we'll turn our attention to this oft-fried classic. This baked version actually does a great job of approximating the taste and crunch while leaving the vegetable healthy. Beware, however! While it's not awful, this side dish also doesn't keep particularly well. You might want to make just what you can eat in one serving and save any leftovers to be made fresh once again.
You'll see that this recipe also contains instructions to prepare a red pepper dipping sauce. I've made the sticks with it once and without it once. The sauce is absolutely delicious, but I found that it prepared far more than I could ever use. I also ended up enjoying the zucchini sticks so much plain that it seemed silly that I spent the ingredents, time, and effort on a sauce. My suggestion is to make it if you'll have several interested parties, but either scale it back or use leftovers on a sandwich or as a fish/chicken marinade. If it's just you and one other person, though, you might just prefer to skip the sauce and head straight for the sticks.
Bon Appetit!
Saturday, July 25, 2009
Crab, Corn, and Tomato Salad with Lemon-Basil Dressing with Leek and Potato Fritters and Lemon Meringue Pie
I have to admit - this might not be the healthiest meal that I ever made. You'll need a good deal of vegetable oil to *gasp* lightly fry the fritters and as much as we try, lemon meringue is inherently unhealthy to a certain extent. But every so often, it's worth it!
This meal combines the cool lightness and the health of a crab, corn, and tomato salad with the warm (and shall we say deliciously not-as-healthy?) fritters. And yes, these fritters are basically latkes but not quite. They are made with leeks rather than onions and vary slightly in their make-up and preparation. But the end result is the delicious taste of fresh latkes... and who can resist them? Finally, the meal is rounded out with a freshly prepared lemon meringue pie. The quintessential summer dish, this pie is made as healthy as it can be and does not fail to satisfy. So invite over some friends and jump on in!
Wednesday, July 22, 2009
Hazelnut Crusted Trout with Corn on the Cob with Lime Butter and Roasted Garlic and Shallot Potato Soup with Cheesy Croutons
This filling meal was prepared for company and was aimed at fulfilling requests for all different flavors. The thick, creamy soup was warm and tantalizing, but would perhaps be more apt for the winter to beat a chill outside. While delicious, it was a little warm for a hot, DC summer day! Still, we managed to force ourselves to eat the blend of potato, roasted garlic, and shallot spooned up with freshly made cheese bread... Such a difficult life.
In addition to the soup I served up a traditional corn on the cob with a unique twist: lime butter. The citrus, summer flavor was the perfect touch to make the corn stand out. And finally, there was, of course, hazelnut crusted trout. The rich nuttiness worked very well with the light trout filets, producing a myriad of delicious flavors.
Roasted Garlic and Shallot Potato Soup with Cheesy Croutons
We'll start with the soup since it is definitely the most time consuming part of this meal! But look how much fun it is to eat it.... absolutely worth the trouble.
This recipe takes a while, but is relatively easy to follow. Just make sure that you time this out so that your entire meal is prepared on time. You'll start here with roasting the garlic (and then shallots as well) which takes 45 minutes in all. And then you'll need to let the garlic and shallots cool enough to peel them before moving to the next step - the sauteing. Use the roasting time as prep time, however, to get ahead. While the garlic/shallots are in the oven make sure that you wash and cut up the potatoes, chop some onion, prepare the broth if you are making it from bouillon cubes as I do, and chop up the Thyme. This way everything is ready to go!
Note: You can also prep for the rest of the meal. I also used this time to peel the corn and wrap it in wax paper to get it ready for cooking as well as to mix up the hazelnut mixture that would be going over the fish.
Once the potato has been boiling for about 10-15 minutes it is proably time to turn your attention to the fish and corn for a bit. Remember, if you end up finishing the soup first you can always keep it on a very low simmer for an extra 5-10 minutes to keep it warm while you catch everything else up to the eating point.
Keep in mind that while this recipe calls for blue cheese you should not feel that you need to use it. I am not a fan of that stinky cheese...(!) and instead decided to use some freshly grated Asiago. Mmmmm!
Hazelnut Crusted Trout
So let's get the rest of the meal going! The trout and the corn will probably take about the same time to prepare (15 minutes tops each) and can be cooked simultaneously. So get them going and then turn your attention back to your soup for some pureeing and milk-ifying.
This recipe is so easy that you do not even need my help! Hopefully while the soup was cooking you prepared the topping for the trout. If not, do so here. You are mixing together panko, hazelnuts, and some spices. While you can substitute regular bread crumbs if need be, I do not recommend it. The texture, crispness, and size of panko works much better with the hazelnuts than normal bread crumbs would. Also, make sure to buy crushed or chopped hazelnuts! If you buy them whole you'll be spending a lot of time pounding a bag full of hazelnuts with a rolling pin or hoping that your blender is super strong.
Simply coat the filets in the mixture, sprinkle any extra across the top of the filets when they are sitting on the pan, and bake!
Corn on the Cob with Lime Butter
Finally, let's get the vegetable going! This lime butter is a fantastic way to mix up regular old corn on the cob with a freshness it has not seen in a long time. If you already peeled your corn on the cob and wrapped it in wax paper, then you are ahead of the game. If not, do so now.
As mentioned before, I find it just as tasty to microwave corn on the cob and it's less work and time than boiling water. If you prefer you can still go the tarditional route, but the microwave truly does suffice here. Place the wax-wrapped cobs in the microwave and cook for 2.5 minutes per corn. (You can simply place them all in at once and multiply.) This way while it is cooking you can continue to keep an eye on your fish and soup!
Then all that is left is to mix up the lime butter. Although I try to use fake butter for everything, it does not microwave well. Fake butter splatters EVERYWHERE when you try to do that. So make sure if you do choose to use the "I can't believe it's not butter" that you cover the bowl well with saran wrap and barely microwave at all. Where a regular tablespoon of butter might take 30 seconds, the fake butter will take barely 10.
Note: There is actually a LIGHT version of I Can't Believe It's Not Butter with fewer calories and fat. Purchase that one to truly save.
Make sure that you only prepare this butter mixture right before eating. You want the butter to be hot when you spoon some over your cob!
Tuesday, July 21, 2009
Grilled Halibut with Fresh Mango Salsa with Strawberry Salad with Poppyseed Dressing
Looking for a light, summery meal that leaves you full without the calories? Then you've come to the right place. This is the perfect dinner for a warm summer night, especially if you have a backyard or roofdeck to enjoy. Whip up this meal, serve with chilled white wine, and then sit back to relax in the nighttime warmth without wilting from the sun. Full of fresh fruit and light sauces, this meal fits summer perfectly.
In addition to the Halibut with Mango Salsa and Strawberry Salad I also whipped up some Zucchini Bread for this meal. I won't detail it below, but search my past posts (where it has been written before) if you want to add this starch component to the meal! The light, sweet, yet veggie-full flavor of the bread pairs perfectly with this meal. And leftover bread is fantastic as a quick breakfast as you run to work, hurrying to get there on time. So are you ready to learn what summer tastes like?
Grilled Halibut with Mango Salsa
Halibut is the epitome of summer fish. It is light, refreshing, and when prepared correctly, so soft and creamy that it will practically melt in your mouth. The only downside (if it can even be called that) is that Halibut is not a particularly flavorful fish on its own. But that is why we have mango salsa! Paired with basically any sauce or topping, this fish is fantastic. It is hard to go wrong. But make sure that unless you are a big fan of bland you don't just cook this fish alone as you can do with blue fish or salmon.
So let's see what this recipe looks like. As you'll see, in true summer fashion, this fish is supposed to be grilled. And if you have easy access to a grill (such as those of you who live in real houses with real yards) that is absolutely what you should do! But more apartment city-folk like me? We use grill pans. And this is where I put mine to use once again.
The mango salsa is delicious, but this recipe, if followed in correct proportions, definitely makes far more salsa than we managed to eat on our fish. And I was generous in my mango servings! The problem was quickly solved: eat it with chips as a salsa or put it in a wrap the next day with some fish or other meat as a yummy burrito or taco.
Strawberry Salad with Poppyseed Dressing
To pair with the light and almost creamy fish, I prepared a strawberry salad. Because who doesn't love strawberries? When they are big, red, and delicious all summer long it's truly hard not to want to add strawberries to everything. So here is your chance to make them a mainstay of your meal!
Once again, this is a very easy and fast recipe to prepare. Toss together lettuce, strawberries, and nuts. I, of course, didn't follow the instructions very well. Instead of romaine I substituted a more vitamin-rich mesclun mix. A good rule of thumb: the darker the leaves the more nutrition you are getting. Sadly, romaine just doesn't always pack the same punch. I also substituted hazelnuts for the almonds, just because I had fresh hazelnuts on hand that looked delicious, and filled my salad with strawberries. I had 1.5-2 cups rather than the 1 cup called for her. But when is more strawberries ever too many?
Mix up the dressing and toss well. This makes a fair amount of dressing. I added slowly, seeing how the salad tossed, and did not end up using all of it. Even though you try to make it healthier, sugar still contains many calories and LF mayo or FF milk are by no means necessarily healthy even if they are more healthful than the originals. Many salads seem healthy but then pile in the caloric dressing. So if you are happy with less, do it!
The strawberry salad and mango halibut both taste best fresh so if you decide to bake zucchini bread, or another, longer-cooking side, make sure you time your creations correctly. Do not start the fish too early or it will get cold - and the salad soggy. Just glance at your recipes, estimate the time, and plan ahead.
And enjoy the summer evening.
Monday, July 20, 2009
Blue Fish with Scallions with Smashed Potatoes with Goat Cheese and Chives and Pan-Grilled Corn with Herbed Tomato and Mushrooms
This meal is a throw-back to many favorite, classic foods but with the slightly off-the-beaten-track blue fish thrown into the mix. For those of you who regularly read Cooking in the Capitol, you'll have read a few weeks back of my love for blue fish. It has a great taste, is easily prepared, is cheap to buy, and pairs nicely with many foods. If you can find it at your local store, that is. But for this recipe we were in luck! I managed to scoop us some blue fish and tried a new recipe with it, a soy and scallion sauce, that turend out perfectly and is detailed below.
The blue fish this time is accompanied by a few classics with a twist. Smashed potatoes, the cousin to the more well known mashed potato, are cooked here with goat cheese and chives to pick up the flavor of the scallions and act as a comfort food. Then, the meal is finished off with a saute of corn, mushrooms, and tomatoes. These classic vegetables will tempt even the strongest vegetable foe while still tasting refreshing and different.
Blue Fish with Scallions
For best results, dig out your old grill pan or go purchase one at your local Bed, Bath, and Beyond. Unfamiliar with grill pans? They are basically exactly what they sound like - a pan disguised as a grill. Meaning, it's similar to your basic fry pan, but usually with a larger base and lower sides. Most importantly, the bottom of the pan is ridged like a grill. While you cannot replicate the charcoal or smoky flavoring you get from a real grill, the pan creates the dark lines that are so unique to grilling and still allows the food to be cooked in a different manner. Since only spots of the fish are touching the pan and others are not, some of the effects of grilling are retained. It is the best we can do in a kitchen!
Marinate the blue fish in soy sauce for 15 minutes in the fridge. Then, heat a small amount of olive oil on your grill pan over medium heat. Place your blue fish on the pan. Pour the soy sauce over top. Add diced scallions so they are both on top and to the side of the fish. I used about 3/4 cup of scallions for 1.5 lbs of fish. Sprinkle the blue fish liberally with black pepper and green pepper. Let it cook for 5 minutes. Add some more soy sauce so the fish is well coated with some sauce, but not a ton, pooling in the pan. Cook for another 5 minutes. Flip the blue fish and continuing cooking for 5-10 minutes or until fully cooked. You can always check by cutting the middle of your thickest filet with a spatula. Once the fish is fully cooked you are ready to enjoy it!
Smashed Potatoes with Goat Cheese and Chives
This is the longest part of the meal to prepare, so make sure that you plan your time accordingly. You'll find that the recipe dictates two different types of smashed potatoes, but I went happily along with the goat cheese and chives. I love goat cheese. Feel free to branch out if you prefer the other option more! Smashed potatoes, while delightful to eat and a little time consuming to prepare, are actually incredibly simple. Mostly you are boiling potatoes, mashing them, and adding a few ingredients. You'll find that this calls for 3 pounds of potatoes and 3/4 cup of goat cheese. You might want to add a little more cheese. While it is certainly healthier without it, I found that 3 lbs of potatoes made such a huge amount of smashed potatoes that the cheese simply disappeared inside. I was unable to taste the goat cheese at all.
I also find that 1/4 teaspoon of black pepper does next to nothing. Add more! Go crazy! A good rule of thumb with smashed potatoes is to add a little, mix it in, and give it a taste. Make sure you continue to add until you enjoy your creation. But remember, 1/4 teaspooon of black pepper doesn't go very far when your biggest pan is chock full of smashed potatoes.
Pan-Grilled Corn with Herbed Tomatoes and Mushrooms
Yum! I love vegetables! This recipe does well since it pairs run-of-the-mill vegetables that are palatable to anyone. It's also incredibly fast and simple to make which is nice since the starch part of this meal took a little longer to prepare. Make sure that when you purchase your frozen corn you pick one that is not already flavored with butter. Also check nutrition lablels - you'll be surprised how much something that is seemingly basic can vary.
The same goes for the diced tomatoes. If you purchase them canned ensure that they are explicitly labeled "no salt added" to avoid ingesting a lot of sodium. Can't find them and still want to be healthier? Use fresh tomatoes and then add some garlic to make up the difference! Fresh garlic and fresh tomato will taste great here. Just make sure to saute the tomatoes and garlic for an extra few minutes to get the right consistency and flavor.
Pair this meal with a nice white wine, or even a light red one, and enjoy!
Friday, July 17, 2009
Shrimp Cakes with Corn and Avocado Salsa with Watermelon Gazpacho
I know I say this about everything, but these shrimp cakes were amazing. Truly. Amazing. Make them now. Think crab cakes or salmon burgers but made with shrimp. It was an odd thing when I first heard but I could not be happier that I dove in and insisted on giving them a try!
The corn and avocado salsa provides a perfect southwestern, summery flavoring to the shrimp cakes although they are definitely good enough to enjoy plain. And the watermelon gazpacho is an incredibly refreshing addition, leaving you feeling happy and satisfied.
Shrimp Cakes with Corn and Avocado Salsa
Read to make these? Then turn to Cooking Light! As you will see, they have a spicy version but as a person who does not particularly enjoy spicy I left that part out. I did not use hot sauce in the cakes or the poblano pepper in the salsa. Feel free to give it a whirl if you are feeling adventurous and enjoy spicier food than I do, however!
One pound of shrimp made about 8 cakes, serving 3 people. Make sure to buy the correct amount! And while I loved the salsa and enjoyed the combination, the shrimp cakes are definitely flavorful and tasty enough to enjoy plain as well. Have extra salsa at the end? Just eat it with chips!
Watermelon Gazpacho
Ready for one of the most refreshing summer dishes ever? Enjoy it! Mostly you buy a lot of summer ingredients and blend them together. It's so easy!
Not a big fan of gazpacho in general? Do not worry. This one is very different than the traditional tomato soup. The watermelon base makes it much lighter, perfect for a light snack or for when you are looking for the perfect side dish to the burgers you are grilling on your roof. Make sure your basil is fresh and included. While this might not sound like an important ingredient it is essential to gain the proper freshness!
So whip this meal together, grab a cold glass of white wine, and enjoy the summer night.
Thursday, July 16, 2009
Help us Get a Public Option
I'm going to side step from cooking today to speak about an important and relevant issue cycling through Congress right now. Healthcare. More specifically, a public option.
Right now, Congress is working on a Healthcare bill, as I am sure that you know. One of the most contentious questions is whether to include a public option. This would help keep insurance companies honest, lower healthcare costs for Americans, and ensure that everyone can receive healthcare. (Which will then actually help premiums since people with insurance do not use the ER as their primary care physician which is ridiculously expensive.)
Basically, the public option is very important.
But not everyone thinks so. Not even all democrats. Many senators receive massive donations from insurance companies and are therefore fearful of standing up agaisnt them. That's not okay. So the PCCC (Progressive Change Campaign Committee) along with many others are campaigning, asking our senators to stand up against special interests and to do what is the in the best interests of the people. Their people. Their constituents.
Did I mention that 76% of Americans support a public option?
So what am I asking? Just that you go VOTE right here:
http://vote.wewantthepublicoption.com/p-jk-psnl
And to do it right now.
If 76% of Americans want a public option, if our President wants a public option, doesn't that mean that our Senators should stand up and vote for it? Don't we elect our Senators to be our representatives? Not to bow to special interests? So vote!
The PCCC has been running ads targeting Democratic senators who do NOT yet support the public option. Their ads have been hugely successful, with over 15,000 people signing up to list their names in the ads in the last couple weeks, several Senators announcing they now support the public option, and huge press in the NY Times, Washington Post, and elsewhere.
They are now holding a contest, voting ends Monday, to determine which Dem senators they should target now. So please go vote! Show support for the PCCC and these ads so they can continue to run them and we can get the public option.
(Note: I am just asking for your free vote! Nothing else.)
Wednesday, July 15, 2009
Oak-Planked Peppercorn Tuna Steaks with Orange Mayonnaise with Stone Fruit Salad with Toasted Almonds and Cracked Pepper-Seed Bread
I must dedicate this entire meal to Cooking Light. Does that make me uncreative or just in admittance that I know a good thing when I find it? Either way, this is a fantastic, savory meal when you're looking for something heartier rather than sugary. The pepper in the bread pairs nicely with that on the tuna, and the nuttiness of the salad fits in nicely with both. Enjoy each piece of this meal separately or make all at once for a delicious-tasting and delicious-looking presentation!
Keep in mind, however, that as healthy as we attempt to make the bread it will still remain fairly high in carbohydrates due to its basic nature. Eat it after a big work out or earlier in the day to give your body maximum burning-off time! Especially enjoy if you're a long-distance runner... (Since those are so common!)
Cracked Pepper-Seed Bread
Although the picture above is for the fish, we'll start with the bread since it is an involved recipe. Keep in mind it will take nearly 3 hours to make this bread since it needs to rise twice and then bake. Start early! But while the bread is rising and baking you can cook something else or even (gasp!) neglect cooking altogether and get something else done. It's a long process with long downtime.
I generally followed this recipe and it turned out well! Keep in mind that this is a savory bread, to be served with a meal and perhaps some butter. It is not a sweet bread or a focaccia that you would want to eat entirely on its own.
Also note this makes two loaves. If you are cooking for a smaller number of people you might want to cut the recipe in half! Only make as much as you will eat in a few days since bread tastes the best when it is fresh.
Finally, while most bread recipes want warm environments for rising, most households do not randomly have an 85 degree area. I simply place the dough in the microwave (with the microwave off) figuring it's slighly warmer than the rest of the house and free of drafts. This always works well for me!
Oak-Planked Peppercorn Tuna Steaks with Orange Mayonnaise
And now for the entree! So get out and buy yourself some nice tuna. And I really do mean that. While tuna varies widely in price it is almost always worth it to buy the higher quality one. This is especially important if you prefer your tuna rare since you especially do not want to get sick!
Follow along with the fish pretty closely, cooking to taste. Not a fan of mayo? This recipe is just as good without it. Or, if you are making for a mix of people who do and do not like it, adjust the amounts accordingly. A small amount of mayo goes a long way! Make sure not to drown your fish.
Stone Fruit Salad with Toasted Almonds
Mmmmmm, this was good! Not sure what a stone fruit is? I wasn't either. But I took a leap and made it and it was worth it!
And then I learned that stone fruits apparently mean peaches, plums, nectarines, and apricots. What amazing powers of deduction I have!
This recipe is about as straight forward as you can get, so mix up your salad and enjoy. Make extra and take to lunch for the next few days as well.
Tuesday, July 14, 2009
Smoked Salmon Pasta with Tomato Bruschetta and Berry-Peach Cobbler with Sugared Almonds
Looking for a good Italian meal? Then you've come to the right place! This combination came out deliciously. My only sorrow was that I ate so much of it I felt as if I needed to head straight back to the gym afterwards...
Beware that while I attempt to make this not unhealthy, it's also not particularly healthy. Think of this as a "medium" meal in that category and make at your own risk... or at least on days after a long gym workout. It's worth the extra calories, but only on rare occasions!
Smoked Salmon Pasta
Heat a small amount of olive oil in a pan.. Add 1/2-2/3 a cup of diced onions. Saute the onions for about 5 minutes, stirring to avoid sticking. Add diced lox. (I prefer Nova Lox since it is far less salty, but you can use regular Lox at your own risk. For those not used to Lox... Smoked Salmon!) I used about 6 oz of Lox, but it might have been slightly more. Continue to stir and heat/cook for another 4-5 minutes.
Pull the pan off the heat and add a shot and a half of vodka. Let the vodka burn for a few minutes and then return the pan to the heat. Add 2/3 cup freshly diced tomatoes. Stir and heat for 3 minutes. Add 1 cup tomato sauce (I prefer to always choose the kind with no salt added) and 1/2 cup of heavy whipping cream. I know, fattening. But there is truly no satisfactory way to get the creaminess of a vodka sauce without it. Just think that it'll be spread out across many meals and therefore not as bad...
Add pinches of salt, pepper, and nutmeg. For those of you who enjoy your food spicier add some chili powder to taste. (I made it without the chili powder which also works well.)
Continue to stir and heat for another 5-7 minutes. Add cooked pasta and stir to coat. Enjoy!
Tomato Bruschetta
Oh bruschetta, how much I love you. And how full of bread (aka carbs) you are. But we'll do our best here to not make you terrible!
This recipe takes us back to Cooking Light. Although there are many ways to make bruschetta this simple recipe remains my absolute favorite version of the classic. I, of course, skip the bacon. Who puts bacon on bruschetta? If you try it let me know in the comments below, but it seems quite odd to me... also I don't eat bacon.
I also choose to add mozzarella in addition to the parmesan. Honestly, this recipe is delicious with just the parmesan or no cheese at all, but I do enjoy sprinkling some mozzarella across the top and letting it melt along with the parmesan. Delicious!
Every time I make this recipe I end up with leftover tomato/bread crumb/basil mixture. And trust me, I stuff as much as possible into the bruschetta until it is overflowing. If you, too, have this problem use it for an omelette the next morning. Although it sounds slightly odd, using the mixture as is in an omelette and just adding osme cheese is actually absolutely delicious!
Berry Peach Cobbler with Sugared Almonds
If you are like me, nothing tastes better in the summer than a fresh fruit cobbler or crisp. Delicious! It evokes all that is summer - the sweetness, fruitiness, and warmth. And when combined with a scoop of ice cream, mixing hot and cold, it is truly amazing.
This cobbler combines peaches, blackberries, and blueberries and comes from the always-fantastic Cooking Light. Sadly, their link isn't working though so it will be pasted below:
SERVES 12 , 12 servings
Ingredients
Filling
18 ounces fresh blueberries
18 ounces fresh blackberries
3 medium peaches, peeled and sliced
cooking spray
2/3 cup granulated sugar
2 1/2 tablespoons cornstarch
3 tablespoons fresh lemon juice
1/8 teaspoon salt
Topping
4 1/2 ounces all-purpose flour (about 1 cup)
1/4 cup granulated sugar
2 tablespoons cornstarch
1/2 teaspoon baking powder
1/8 teaspoon salt
6 tablespoons chilled butter, cut into small pieces
1/2 cup half-and-half
1/3 cup almonds, sliced
3 tablespoons turbinado sugar
1 tablespoon egg white
Other
4 cups vanilla ice cream
Directions
1) Preheat oven to 350.
2) To prepare filling, combine blueberries, blackberries, and peaches in a 13x9 inch baking dish lightly coated with cooking spray. Sprinkle 2/3 cup granulated sugar, 2 1/2 tablespoon cornstarch, juice, and 1/8 teaspoon salt over fruit; toss gently to combine.
3) To prepare topping, weigh or lightly spoon flour into a dry measuring cup; level with a knife. Combine flour, 1/4 cup granulated sugar, 2 tablespoons cornstarch, baking powder, and 1/8 teaspoonsalt, stirring well. Cut butter into flour mixture with a pastry blender or two knives until mixture resembles coarse meal. Add half-and-half; gently knead dough just until moistened. Drop dough by spoonfuls evenly over top of filling. Combine almonds, turbinado sugar, and egg white; sprinkle over top.
4) Bake at 350 for 50 minutes or until topping is browned. Let stand 10 minutes. Serve with ice cream.
Not sure where to find turbinado sugar? It's basically brown sugar which will work just as well. Keep in mind this makes a LOT of cobbler so if you won't eat it in time you might want to cut the recipe in half.
Serve warm and heat leftovers before consuming for maximum enjoyment.
Tuesday, July 7, 2009
Blue Fish in a White Wine Sauce with Zucchini Bread
Oh Blue Fish, I am a fan. It's true. This inexpensive, oft-overlooked fish is absolutely delicious. And I bet you've never had it. Who has? It's not the common one on menus or the frequently offered selection at your average grocery store. Yet it's flavorful, cheap, and healthy. What's not to like?
In this post I prepare it in a white wine sauce and pair it with zucchini bread and brussel sprouts (previously discussed on Cooking in the Capitol.) The flavor of the blue fish makes it best cooked in a light sauce, allowing the natural taste to come through while the lightness yet intenseness of zucchini breads matches the fish nicely. Round out this meal with a white wine and enjoy!
Blue Fish in a White Wine Sauce
To start, find a Whole Foods or other upscale supermarket! You will rarely find Blue Fish in your average grocery store since it is slightly more rare. But do know that when you finally located it, it'll be inexpensive, just around $9-$10 a pound. Makes for an economical dinner!
Pre-heat a small amount of olive oil in a pan. Place the bluefish in the pan. Ad diced onions and halved cherry tomatoes. For one pound of fish I added roughly 1/2 cup of onion and 3/4 cup of tomato, but feel free to use as little or as much as you want. Sprinkle on a small amount of salt and some black pepper. Pour in 1/2 cup of white wine - just choose whichever one you like best! Here I used a cooking sherry, but in the past I've just used my favorite Riesling or Sauvignon Blanc that I will then be drinking with dinner.
Allow the fish to cook for 5-7 minutes. Flip the bluefish over. If you have it, add a splash of cointreau. If the wine is cooking away add another splash of wine. Cook for another 5-7 minutes or until fish is cooked through. And that's it!
Enjoy your meal but keep in mind that sometimes Blue Fish has been known to have small bones in it. Not too many to turn you away from the fish, but perhaps a couple per filet. Watch out to avoid swallowing them!
Zucchini Bread
And I do love it. Ever had it? If not, don't be scared. Although you might be expecting a heavily-vegetabled starch that is an unappealing green color, zucchini bread actually looks quite normal and comes out sweet. Think of it as a cousin to banana bread. It's great with dinner, but also as dessert or even breakfast. Eat it plain or enjoy it with cream cheese for breakfast! You can also add chocolate chips if you are preparing a dessert version.
If you are sticking with my basic version head on over to Cooking Light. I skipped out on walnuts since I'm not such a big fan. If you like them, go for them, but if not do not worry - this bread is absolutely, 100% delicious without them.
Keep in mind this recipe is for two loaves and you can halve it if you want just one!
Enjoy! Let me know what you think.
Wednesday, July 1, 2009
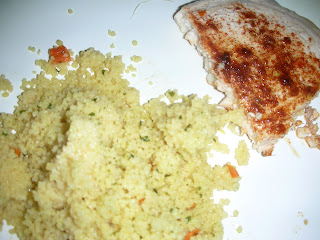
Moroccan Swordfish with Mint-Yogurt Sauce with Corn on the Cob with Smoked Butter and Cous-Cous
Oh, Morocco. I must admit, it's the most fun part of my heritage. Although I am a smorgasbord of ethnicities, the Moroccan side is the one that I most enjoy identifying with. It's exotic, exciting, different, and fun. People perk up when I say I am Moroccan in a way that just doesn't happen with German, Polish, Lithuanian, or any of my many other sides. But when I say I'm Moroccan, that my mother was even born there making me first-generation on that side, they find it amazing. And I had to admit that I find it pretty cool, too. So why not explore some more Moroccan cooking?
Most people identify Moroccan food as Middle Eastern food heavy on hummus, babaghanouj, pita bread, etc. And toss in some cous-cous of course. But there is so much more to it. A coastal country, Morocco has a lot of fish. A Middle Eastern country, Moroccan cooking includes lamb, exotic spices, and lots of fresh vegetables that look rather different than many that cross our plates here. But most importantly, Moroccan food is exciting. It's unique, exotic. It's African, Mediterranean, and Middle Eastern all rolled into one. So jump on in, grab a belly dancer, and try it and realize that this Swordfish, exotic or not, is certainly delicious.
Moroccan Swordfish with Mint-Yogurt Sauce
Good ol' Cooking Light came through on this one once again. The recipe is simple and to the point, creating a spice rub for the Swordfish which is cooked on the stove and then mixing up a sauce to go along with it. I skipped the capers when preparing the fish since I am not such a big fan. Not familiar with capers? They look almost like a smaller pea, spherical and green, and tend to be rather salty. They are frequently served with lox. Capers are a heavily Middle Eastern food, but sadly not one in which I partake very eagerly. Throw them on if you are a fan or feeling adventurous, but also rest assured that keeping them out won't hurt the recipe.
I started the Swordfish cooking and then whipped up the sauce. It only takes a few minutes, but if you make it earlier make sure to refrigerate it. The refreshing mint flavor works best chilled. Serve the fish with the sauce available on the side so that everyone can take as little or as much as they choose!
Finally, I served this fish over cous-cous. What else could you possibly choose with a Moroccan recipe? I tend to like the more basic cous-cous options without going straight plain, such as pine nuts. Choose whichever variety you like, however! The cous-cous will soak up the sauce and flavoring of the fish if served underneath it so keep that in mind when choosing.
Corn on the Cob with Smoked Butter
To round out this meal I chose to make corn on the cob as the vegetable. A simple, fast dish I felt that while it might not traditionally be prepared with Moroccan food the flavors would complement each other here.
The recipe calls for boiling or grilling your corn, which are great options, but honestly I find microwaving the corn equally as tasty and much easier. Shuck your corn, disposing of the husks and the silky fibers. Break off the end if it is sticking out so you have just the basic cob. Wrap each cob in wax paper, twisting the ends so it looks like a hard candy wrapper. Microwave on high at 2.5 minutes per cob. (You can put them all in at once, but multiply the time. I was making 4 cobs so I microwaved them for 10 minutes.)
While the corn is microwaving prepare the sauce as intructed by the Cooking Light recipe. Looking to make it even healthier? I chose to use fake butter instead, although then I reasoned I could make slightly more to ensure that I had enough for 4 cobs. You could not tell the difference, I promise! It was a light, tasty sauce that provided just enough flavoring to entice you to gobble down the corn as quickly as possible. Make sure to make enough so that everyone can have two cobs - it will be too hard to stop at less!
Now you just have to learn to belly dance.
Subscribe to:
Posts (Atom)